Installing polyca
rbonate sheets correctly is the difference between a roof that lasts 15+ years and one that warps, leaks, or cracks within the first season. Whether you’re building a carport canopy, a greenhouse roof, or a patio cover, getting the installation right from day one saves you expensive repairs down the road.
This guide walks you through every step of the process — from choosing the right tools to final sealing. It’s written for DIYers, contractors, and anyone who wants a professional-grade result without guesswork.
What You’ll Need: Tools & Materials Checklist
- Polycarbonate sheets — twin-wall, solid, or corrugated (make sure they have UV protection on the side facing the sun)
- Circular saw or jigsaw with a fine-tooth blade (10-12 teeth per inch for clean cuts)
- Measuring tape and marker
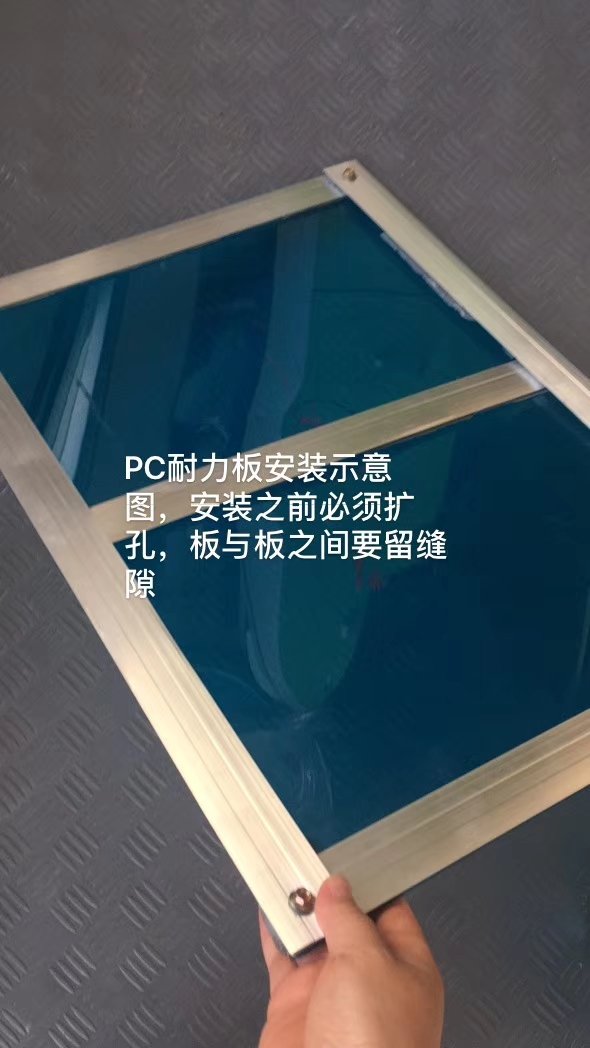
- Electric drill with bits sized 2-3mm larger than your screws (critical for thermal expansion)
- Self-tapping screws with EPDM washers (standard wood screws will destroy the sheet)
- Aluminum profiles: H-connectors, U-channel end caps, and F-profiles (depending on your project)
- EPDM sealing tape or neutral-cure silicone sealant (NOT acetic cure — it attacks polycarbonate)
- Breathable anti-dust tape for open channel ends
- Safety gear: gloves, goggles, dust mask
Step 1: Measure Twice, Cut Once
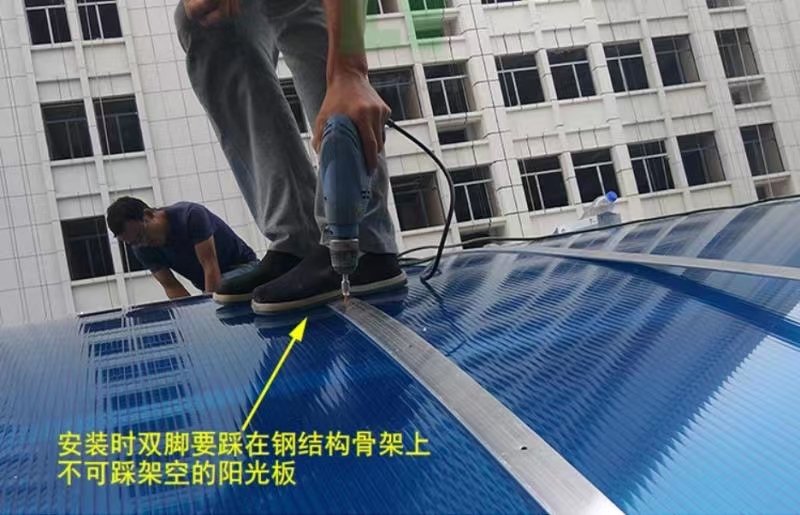
Polycarbonate expands and contracts with temperature changes — up to 3mm per meter in extreme conditions. If you drill exact-fit holes and screw the sheet down tight, it WILL buckle on hot days or crack on cold ones.
The rule is simple: drill holes 2-3mm wider than the screw shaft. For a standard 5mm screw, drill a 7-8mm hole. This gives the sheet room to move without stressing the material. Place screws every 400-500mm along profiles, and never overtighten — the EPDM washer should compress slightly, but the sheet should still be able to slide.
Position the first screw at the center of the sheet and work outward toward the edges. This lets the sheet expand evenly in both directions from a fixed center point.
Step 2: Drill Oversized Holes — The Thermal Expansion Rule
Step 3: Seal Channels and Edges Properly
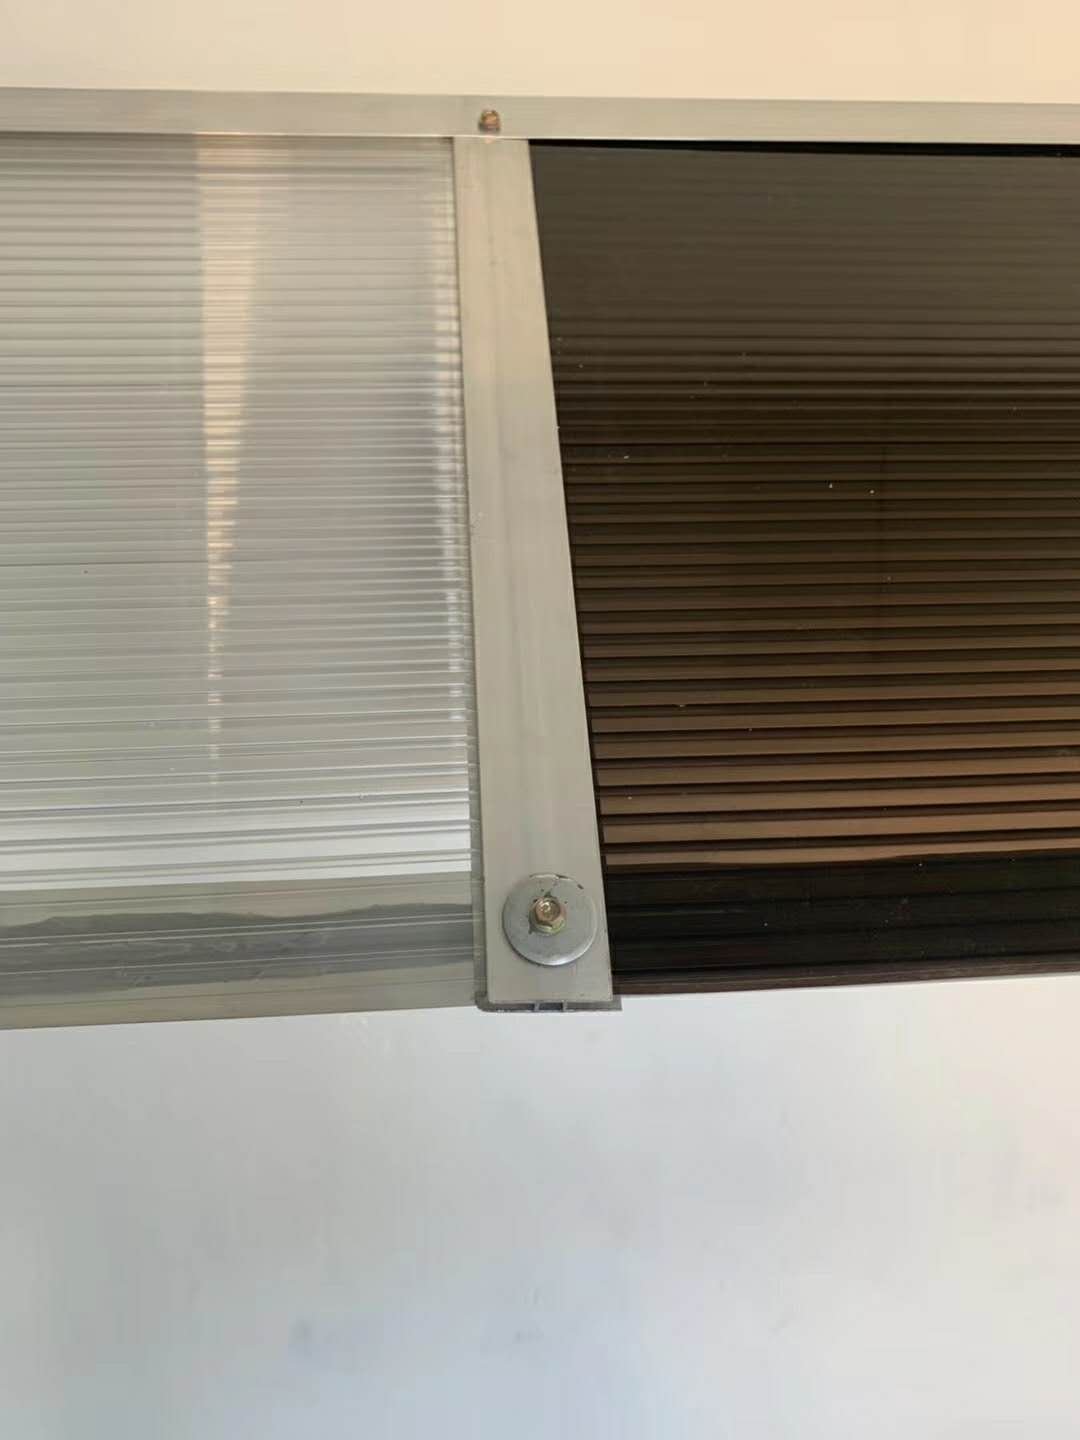
The open ends of twin-wall and multiwall sheets are dirt and moisture magnets. Every open channel at the top edge must be sealed with solid aluminum or polycarbonate tape to block water ingress. The bottom edge needs breathable anti-dust tape — it keeps bugs and dust out while letting condensation escape.
After taping, cap all edges with U-channel aluminum profiles. These protect the taped ends from UV exposure and physical damage. For overlapping joints in corrugated sheets, apply a bead of neutral-cure silicone sealant between the overlaps before fastening.
Warning: Never use acetic-cure (vinegar-smelling) silicone on polycarbonate. The acetic acid released during curing chemically attacks the sheet surface, causing micro-cracks and hazing. Always use neutral-cure silicone labeled “safe for polycarbonate.”
Step 4: Final Inspection and Maintenance
Once everything is installed, peel off the protective film — leaving it on under sunlight bakes it onto the surface permanently. Walk the entire installation and check:
- All screws have EPDM washers and aren’t overtightened
- Channel ends are sealed and capped
- Sheets sit evenly with no visible warping
- Overlaps are sealed and water-test passes
For ongoing maintenance, clean sheets twice a year with warm water and a soft cloth. Avoid abrasive cleaners, high-pressure washers, and anything containing ammonia or solvents — they permanently damage the UV coating.
Frequently Asked Questions
Q: Can I install polycarbonate sheets directly on wood purlins?
A: Yes, but you must use aluminum profiles between the wood and the sheet. Wood expands at a different rate than polycarbonate, and direct contact traps moisture that leads to rot and staining.
Q: How much slope does a polycarbonate roof need?
A: Minimum 5 degrees (about 1:12 pitch) for twin-wall sheets. For corrugated sheets, 10 degrees minimum is recommended. Flat installation (0 degree slope) is not recommended — water will pool, and the warranty won’t cover it.
Q: Which side faces the sun?
A: The side with the UV protective film or the side marked with printing. Twin-wall sheets typically have the UV coating on one side only — installing it facing down means zero UV protection and the sheet will yellow within 1-2 years.
Q: How long do properly installed polycarbonate sheets last?
A: With correct installation and maintenance, co-extruded UV-protected polycarbonate sheets typically last 10-15 years in outdoor applications. Premium grades with 50 micron plus UV coating can exceed 20 years.
Get Expert Support for Your Project
Every project is different. If you’re unsure about sheet selection, structural requirements, or need help calculating quantities, our team provides free technical consultations for your specific project. Contact our team for a quote — we’ll help you get it right the first time.